By: Carlos Moo Koon Chean
My window restoration venture began earlier this fall after a $9k estimate from a new window manufacturer to replace all 16 windows in my 50-year old ranch house seemed a bit too much. This house was bought as an investment property and I figured that it wouldn’t make much sense to spend almost a year’s worth of rent just to replace the windows.
I contacted several handymen and their replies would always fall into one of two categories: either they didn’t work on this type project or they just didn’t want to spend that much time doing it. I realized that, even if I found a professional that would restore these windows for me, the price would also be prohibitive. If I wanted this restoration done, I would have to do it myself. All I wanted was to replace the old, dried out and cracked glazing in my old wooden windows and I imagined it would be an easy job. However, as I started this project, I soon came to the conclusion that it would take much longer than I thought. Below are the steps that were done for this project:
- Remove storm windows: since I was not going to remove the windows due to lack of time and skills, all storm windows had to be removed prior to starting this project. Smaller storm windows were being held by 9 screws and larger ones used 13 screws. I used a power screwdriver for the job. The challenge here is that I was working alone and, and my house is a raised ranch, so for some of the windows I had to use a 16-foot ladder and once all the screws were removed I had to be very careful as the only thing holding the storm window was the metal frame around it. I had to hold it with just one hand while using the other hand to hold on to the ladder. This step took about 15 minutes per window.

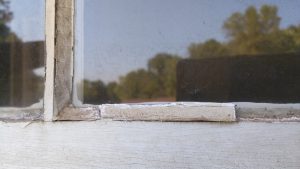


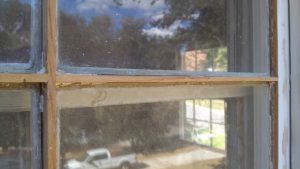
- Remove old glazing: in some areas the old putty would fall off just by staring at it, but everywhere else it was still attached. After trying several different tools, I decided to use a hammer and an old putty knife as a chisel. The right amount of force in the right spot was very efficient in scraping the dried putty out. Time: about 60 minutes per window.


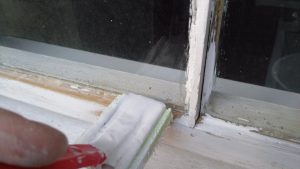
- Sanding: With the old glazing out of the way, it was time to sand the sashes. The wood was darkened in some spots and it had a funky smell which indicated there was some mildew growth going on. From bare sanding sheets, to sanding blocks and even an electric sander, I’ve tried them all and the most efficient method was a multi-function oscillating tool with the sanding attachment, as its pointed shape was better fitted to sand each frame. I used mostly 80 or 120 grit sandpaper, but some areas required as low as 40 or 60 grit. I also sanded the entire wood surface of each window, some of them were in really bad shape for being exposed to the harsh weather condition in North Carolina during all these years. This was the step where I broke most glass panes, as I might have been hitting the oscillating tool too hard. Anyway, at the end, I broke 15 panes out of 192. Not too bad I think. Time: about 60 minutes per window.

- Priming: I used one coat of primer. At first I tried with a 1” brush, but it was too messy. I used a small “Shur-Line” edger brush from Home Depot and it worked better. This tool has a small rectangular foam-type brush at the end. My mistake here is that I used Zinsser’s “Bull’s Eye” water-based primer instead of an oil-based primer. Not only the frames, but the whole windows were primed. Time: +/- 45 minutes.

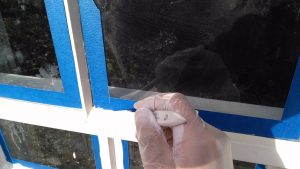
- Glazing: this was the step that took me the longest. At the beginning, I had to figure out the best way to handle the putty knife and apply the putty. This was my first time doing this and I wasn’t sure how much force to apply or at which angle should the putty knife be. Fortunately, I used SARCO dual glazing which is a VERY forgiving product and it makes you feel you’ve been doing this for years. I tried to run the putty knife at a 20 degree angle in order to improve aesthetics and save on the amount of putty. By the 4th window I got the hang of it. I have to say that SARCO glazing is an outstanding product. Time: between 60-90 minutes per window.


- Curing: each window was labeled with the date as I finished glazing them, this would help me keep track of how long the glazing was curing for. I decided that I wanted to wait at least three weeks before I started painting.
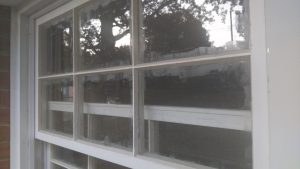
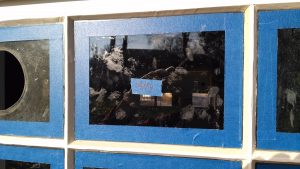
- Sanding/Taping: after the glazing has cured and formed a skin, each window sash was lightly sanded again to remove excess glazing around the edges. It was then brushed to get rid of excess dust and painters tape was applied in each glass, leaving about a 2-3mm gap over all the perimeter of the glazing’s edge. Time: 60 minutes.


- Painting: each window was painted with “BEHR” oil-based semi-gloss enamel. The manufacturer advertises this paint as being UV and mildew-resistant. The paint was thinned in a 5:1 ratio and three coats were applied using a natural bristle brush. I waited for an interval of 16-20 hours between coats. There is some dripped paint in the glass that will be removed with a razor scraper. Time: 30 minutes each coat.
What started out to be something that needed to be done, evolved into a pleasant and rich experience where I could connect to my house and made me learn not only about the techniques involved in this restoration, but also taught me to appreciate the beauty and charm of vintage windows. Even small defects along the way, like missing wood splinters or dripped paint, just added more character to these old windows.
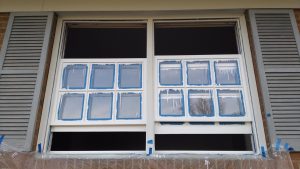

P.S.: As the project isn’t yet finished till the deadline for entering this contest, the latest pictures that I submitted still show the painter’s tape attached to the windows.